Renishaw, a world leader in precision engineering technologies, will be exhibiting its extensive range of metrology and additive manufacturing equipment at EMO 2015.Products highlighted in Hall 5, Stand D15, will include new software for the Equator™ flexible gauge, which allows users to create simple gauging routines in minutes, new MODUS 2 metrology software suite which simplifies the programming of co-ordinate measuring machines (CMMs), a new ‘pay-as-you-go’ machine tool probe system and a simple single-axis tool setter. Further new product announcements will be made ahead of the exhibition.
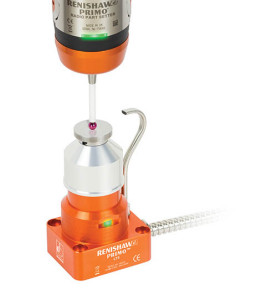
Making its European trade show debut will be the Primo™ twin-probe system, which brings with it all the advantages of automated setting within a breakthrough ‘pay-as-you-go’ business model. Recognising that probe systems are the foundation of precision machining, the new Primo system brings high-end manufacturing within reach of companies of all sizes through a combination of minimal upfront costs, a free, comprehensive training package, and immediate parts replacement.
 The twin-probe system comprises the Primo Radio Part Setter, Primo Radio 3D Tool Setter and Primo interface, plus three key additional elements: the Primo Credit Token, GoProbe software and Primo Total Protect which provides cover against accidental probe damage. The system is supplied with a six-month credit token which enables unlimited use of the Primo twin-probe system during that period; once the credit expires, users can simply purchase an additional credit token to extend usage.
Also new and supplied as standard with the Primo twin-probe system is user-friendly GoProbe software, which offers a unique combination of software, training materials and user reference tools, including new apps for Apple iOS and Android devices. Designed to make it simple to use Renishaw machine tool probes, GoProbe includes complete part setting, tool setting and probe setup cycles, yet requires no previous probing experience.
The self-study GoProbe training kit, which includes an e-learning course and a training part to practice on, helps to build knowledge and confidence rapidly, so that processes can be optimised as soon as possible. It eliminates the need for extensive knowledge of G-codes, requiring only simple single-line commands, which also makes it easy to progress from basic manual cycles to more complex automated cycles.
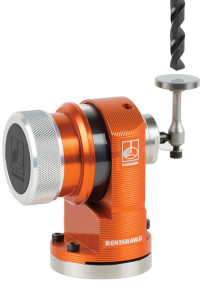
 Also new for CNC machining centres is the Primo LTS (length tool setter), a single-axis system which allows users to quickly set tool length, check for breakage and compensate for thermal growth. The automated system which is designed to operate in the harshest of environments will be up to ten times faster than manual setting methods. A further innovation for EMO 2015, which brings ‘intelligent speed’ to machine tool probing, is Inspection Plus with SupaTouch™ optimisation. This new software package automatically determines and selects the highest feed rates a machine tool can achieve whilst maintaining metrological accuracy. It also uses intelligent in-cycle decision making to implement either a one or two-touch probing strategy for each measurement routine. The result is minimised cycle times and maximised productivity.
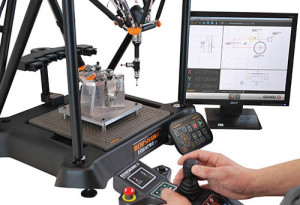
At EMO 2015 Renishaw will also show its new INTUO™ gauging software which is now offered with the unique Equator system to simplify and automate the gauging of a wide variety of parts, removing dependence on the skill of manual gauge users. This package also makes an ideal alternative to multiple manual devices such as vernier or digital callipers, micrometres and plug gauges.
With minimal training, the INTUO software allows the programmer to create gauging routines using just a part with an engineering drawing. With the ‘Feature Predict’ function activated, the programmer uses the joystick to take points on each feature while INTUO does most of the work, by predicting the type of feature, the nominal value and a possible tolerance band. It is then easy to adjust the program to change the number of points taken or to space them evenly, and match nominals and tolerances to the engineering drawing. Shop-floor operators then simply select and run these programs within the user-friendly Renishaw Organiser front-end software.
INTUO with Equator is an ideal alternative to multiple manual devices such as vernier or digital callipers, micrometres and plug gauges. Equator is highly repeatable and runs fast automated routines, meaning significantly reduced labour costs. With many workshops using hundreds of manual gauges this cost saving can be considerable. INTUO allows the programmer to create gauging routines using just a part with an engineering drawing. With the Feature Predict function activated, the programmer uses the joystick to take points on each feature while INTUO does most of the work, by predicting the type of feature, the nominal value and a possible tolerance band. It is then easy to adjust the program to change the number of points taken or to space them evenly, and match nominals and tolerances to the engineering drawing.
 It is a simple task to input the actual values for features on the master part, which does not need to be a ‘perfect part’. In fact it is preferable that a production part manufactured with the same method and material is used. First the features required are measured on a certified device, like a calibrated manual gauge or any co-ordinate measuring machine (CMM). The values from this master part inspection report can be manually added to a table in Organiser or to the corresponding field in INTUO; changing one will update the other.
Renishaw is also launching the Equator Button Interface (EBI), with simple push-button controls for shop-floor operators, removing the need for a mouse and keyboard. The EBI can be operated by staff wearing gloves and is not affected by shop-floor contamination.
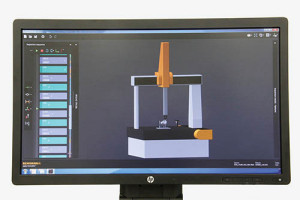
Users of coordinate measuring machines visiting EMO 2015 will also be interested to see how the MODUS 2 metrology software suite brings new levels of clarity and efficiency to the programming and operation of CMMs. Based on the established and highly capable MODUS platform, and supporting Renishaw’s range of three and five-axis CMM sensor technologies, MODUS 2 has been designed with usability in mind, including an innovative, easy-to-learn interface and faster programming, resulting in unprecedented levels of productivity with or without a CAD model.
 Based on the established and highly capable MODUS platform and supporting Renishaw’s suite of 3 and 5-axis CMM sensor technologies, MODUS 2 has been designed with usability in mind.
The user experience for MODUS 2 is also designed to be identical whether the software is connected to a ‘live’ CMM or working in an offline environment where full simulation with speed control allows measurement sequence development and visualisation.
A complete redesign of the software interface with the introduction of ‘Off Surface’ motion technology, intelligent measurement strategies, automatic reporting and an interactive virtual CMM environment are just some of the innovations that enhance the user experience. From simple manual CMM operation through to complex part measurement on multi-axis systems, MODUS 2 adapts automatically and only offers functionality relevant to the current task.
Intelligent extraction of CAD data and knowledge of underlying geometry determine the measurement strategy. However, consistency in measurement methods is paramount accross an organisation, and MODUS 2 facilitates this by allowing users to collaborate on data collection properties and parameters such as fitting algorithms and filters. Visitors will be able to see and interact with demonstrations of GoProbe, INTUO, and MODUS 2 at the Renishaw stand.
Renishaw is also continuing to develop its Web shop (www.renishaw.com/shop) with a focus on offering a user-friendly environment which allows customers easy access to a large and increasing range of the company’s metrology products at any time of the day. Now live in fourteen countries, with more to be added this year, the Web shop includes Renishaw fixtures for CMMs, vision systems and the Equator gauge; an extensive range of precision styli; CMM accessories such as racks, probe extensions and TP20 modules; and credit tokens for the new PRIMO twin-probe system for machine tools.
Renishaw plc
Tel: 01453 524524
Email: uk@renishaw.com
www.renishaw.com